
ADD PEOPLE TO YOUR ORGANIZATION

This section will guide you through the process of adding, editing and removing individuals within your organization.
Managing Team Members in Teamdeck
To effectively manage your team members' work in Teamdeck, you must first add them to your organization. Follow the steps below to add team members and utilize the search and filtering options available.
Access the "Settings" menu from the top menu bar and select "People".
The "People" section will display a list of individuals who are already part of your organization.
Use the available elements to search and filter the list:
Utilize the filter option to display specific categories such as team members, basic resources, or individuals who haven't accepted their invitations yet.
Use the search bar to quickly find a person by typing their name or email. Additionally, once you've added custom fields, you can filter people based on those fields.
Sort the list by name in ascending or descending order using the appropriate option.
Adding Custom Fields for People
To enhance the information stored for each individual in your organization, Teamdeck allows you to utilize Custom Fields. These fields enable you to provide additional details and tailor the information to your requirements. Click here and follow the instructions.
Adding New People to Your Organization
To add new individuals to your organization in Teamdeck, follow the instructions below. You have the option to add team members or basic resources based on your requirements.


Adding Team Members
Access the "Settings" menu and select "People."
Click on the plus icon located in the bottom right corner.
A dialog box will appear. Choose "Team Member" from the options provided.
Enter the name of the person you want to add.
Specify any custom fields related to this person. If you haven't defined custom fields yet, you will be directed to the Custom Fields tab to add them.
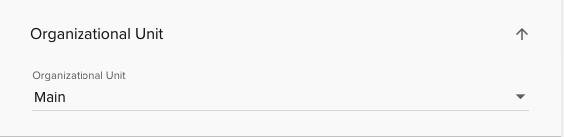
Specify the Organizational Unit to which the person will be assigned. Bank holidays assigned to this unit will be grayed out on the Calendar, indicating the person's unavailability.
Proceed to the "Team Member Settings" section:
Select a role for the team member.
Enter the email address of the new team member. An email invitation will be sent, and the person will need to activate their account. They will be listed in your Calendar immediately.
Choose the Organizational Units to which the individual should be granted access. Read more about access here.
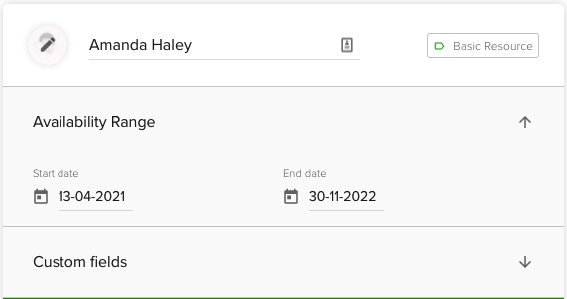
Optionally, define the Availability Range to set the contract start date. Until the start date, the team member will not have availability displayed on the Calendar and Reports.
Choose whether the team member can specify their hourly availability. This feature is useful for part-time employees to communicate their exact working hours.
Once you have provided all the necessary information, click "Add." An invitation will be sent to the new team member.
Adding Basic Resources
Go to the "Settings" menu and select "People."
Click on the plus icon located in the bottom right corner.
In the dialog box that appears, choose "Basic Resource."
Enter the name of the new Basic Resource.
Specify any relevant custom fields. If you haven't defined custom fields yet, you will be directed to the Custom Fields tab to add them.
After filling in the required details, click "Add." The new basic resource will be immediately visible in the Calendar.
Add more information about people: you can provide details about people in the form of Custom Fields. Click here to learn how to add and manage them.
Import People to your Organization
You can import multiple people using a .csv/.txt file or paste data from your spreadsheet.
NOTE: You have to have an owner role in Teamdeck to import people. This feature is only available for Business Plan users.
Choose Import People or go to Settings -> Data Import and click on the ImportPeople button.
You can update information about existing people added to your organization if they are present in the import file (the matching is done by name).

Option 1 - Upload a .csv file
You can download a .csv file template to populate your data on the second step of the import wizard.

There are several columns in the file:
Type - type Team Member or Basic Resource (read more about types of people in Teamdeck here)
Name - type their name
Email - type their email (leave empty if this person is a Basic Resource)
Role - type Regular, Manager, or Owner (leave empty if this person is a Basic Resource) - you can learn more about roles here.
Hide from calendars and reporting - type Y if this person should be hidden from calendars and reporting, and type N if they should be listed everywhere.
Will have to specify working hours - type Y if this person is a part-time employee who will define their availability separately; for full-time employees, type N.
Organizational Unit - the Organization unit assigned to an imported person. Read more about units here. (Default is Main).
Job title - an example of a people custom field (to be replaced with the custom field name added to your organization).
Department - an example people custom field (to be replaced with the custom field name added to your organization).
Contract start date - type in the date (in a format set up in your profile settings). This information is used to set up the availability in the system. Leave blank if not applicable.
Contract end date - type in the date (in a format set up in your profile settings). This information is used to show that this person is not available for bookings (no availability) on a calendar after the specified date. Leave blank if not applicable.
The columns in bold are required and must be filled in with the value in the imported CSV.
Team Member, Jane Doe, janelovesteamdeck@gmail.com, Manager, N, N, Main <- would be a team member with manager rights who works full time and is listed in the Calendar.
Columns Job Title and Department are additional custom fields. You can fill them out or not. If you don’t want to import custom fields, simply remove their names from the first row.
Important: Remember to use square brackets when adding custom field values:
Team Member, Jane Doe, janelovesteamdeck@gmail.com, Manager, N, N, Main, [Frontend Developer], [Development] <- means that this person’s job title is Frontend Developer and they work in the Development department
You can add multiple tags per custom field but remember not to separate them with commas:
Team Member, Jane Doe, janelovesteamdeck@gmail.com, Manager, N, N, Main, [Frontend Developer], [Development] [Growth] <- the latter two tags all belong to the same custom field (Department) and thus are not separated with commas.
You can also add your custom fields (note: if you haven’t added them to the app yet, they will be automatically created). To do that add the name of your custom field to the first row and populate the rest of the rows with appropriate values. Make sure the order of your tags reflects the order of fields in the first row:
First row: Type, Name, Email, Role, Hide from calendars and reporting, Will have to specify working hours, Office (Office is a new custom field)
Other rows: Team Member, Jane Doe, janelovesteamdeck@gmail.com, Manager, N, N, Main, [Los Angeles] (Every tag corresponds with a field name from the first row)
Option 2 - Paste from a .xls file
Prepare your data in a spreadsheet. The first row should consist of the names of the fields. Type,Name, Email, Role, Hide from calendars and reporting, Will have to specify working hours fields are obligatory:
Type - type Team Member or Basic Resource (read more about types of people in Teamdeck here)
Name - type their name
Email - type their email (leave empty if this person is a Basic Resource)
Role - type Regular, Manager, or Owner (leave empty if this person is a Basic Resource) - you can learn more about roles here.
Hide from calendars and reporting - type Y if this person should be hidden from calendars and reporting, and type N if they should be listed everywhere.
Will have to specify working hours - type Y if this person is a part-time employee who will define their availability separately, for full-time employees type N
Organizational Unit - the Organization unit assigned to an imported person. Read more about units here. (Default is Main).
The rest of the column can be your custom fields (note: if you haven’t added them to the app yet, they will be automatically created). Add their name in the first row and populate the rest of the rows with appropriate values. If you want to add multiple tags per custom field, type them in one cell together. Remember to use square brackets for the custom field values.

When your spreadsheet is ready, copy the cells and paste them into the designated table.
Review your data
Once your data is uploaded but before the import starts, you can double-check the data you’re about to import. This is your chance to edit your entries or remove any unnecessary tags. Teamdeck will also inform you about inconsistencies. When your data looks good, click Start import.

Editing and Removing People
To edit or remove a person from your organization, follow these steps:
Access the Settings menu and select "People".
Locate the person you wish to edit or remove and click on their name.
Edit the information as needed in the form that appears.
Click "Save" to apply the changes.
Removing Team Members
To remove a team member, click on the More options (three dots) icon located in the bottom left corner.
Select "Remove" and confirm your decision by clicking "Yes" in the popup.
Removing Basic Resources
To remove a basic resource, click on the trash bin icon in the bottom left corner.
Confirm the removal by clicking "Yes" in the popup.
For more information on adding and managing custom fields for people, refer to the guide on adding and managing Custom Fields.