
ADD MORE INFORMATION ABOUT PEOPLE AND PROJECTS

Use custom fields to add more details to people and projects.
This article will show you how to set up custom fields–tags that carry extra information about your team members and projects.
If you want to learn about adding new projects head here. In order to learn about adding new team members, go here.
Custom fields allow you to personalize the app and store important information about people and projects. You can filter people and projects using your custom fields. Imagine you’re working in a 90-people software house and you need a Senior Frontend Developer to lead the next project. If you have a custom field “job title” you can see all of the available people in a few seconds.
Some of the common custom fields Teamdeck’s users create:
For projects:
- Name of the client
- Budget type (T&M, Fixed price)
For people:
- Department
- Job title
- Seniority
CREATE A CUSTOM FIELD
Go to the settings tab in the top menu bar and pick custom fields from the list. Then click on the plus sign in the lower-right corner.
In the dialog window decide whether you want to add a custom field to the projects or to the team members. Then, create a name and pick a custom field type:
- text - can be created separately for every new project/team member, it’s a text field. You can set a default value that will be displayed when the field is not edited.
- list - will be chosen from the list for every new project/team member. The list can be edited anytime. You can enable multiple selections and pick a default value.
Click on required to make sure every new project/team member has this custom field filled out.
EDIT/REMOVE CUSTOM FIELDS
In order to edit your custom fields, go to the settings tab in the top menu bar and pick custom fields from the menu list. You will see a list of your custom fields displayed there - you can filter it just to see, for example, just the people-related ones. Then click on a custom field you want to edit and start editing.
In order to remove your custom field, click on the trash bin icon in the bottom left corner of a given custom field.
FILTER THE CALENDAR USING CUSTOM FIELDS
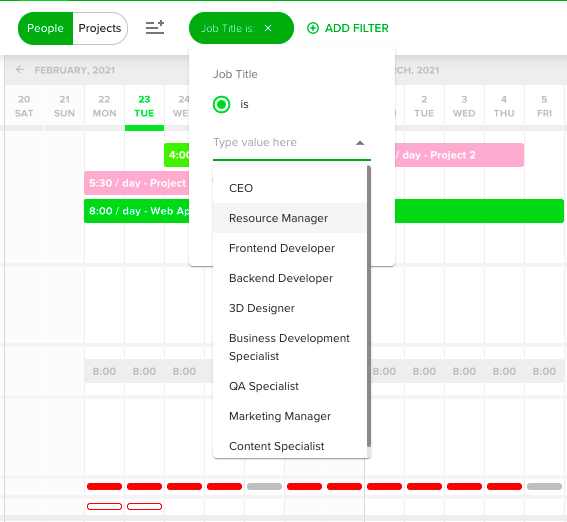
You can filter your Calendar using custom fields.
Click the pencil icon to the left of your calendar to expand the sidebar and filter the current view. If you want to add a new view, click new view. Then click add filters and decide what type of custom field you want to filter your list by. You can use multiple custom fields at once to narrow down your results. All of the records that match your requirements will be displayed.
USE CUSTOM FIELDS IN YOUR REPORTS
When you’re browsing your reports you’re able to use custom fields to narrow down the data. Depending on your custom fields, you can, for example, analyze the performance of your marketing team or look into projects that came from one particular client.
In order to filter the reports using custom fields click the Filter icon to expand the left sidebar. Then pick the custom fields you want to use, you can select multiple fields and analyze people-related custom fields and project-related custom fields at once. This way you can analyze smaller samples.