
SSO Integration

Learn how to configure and login using Single Sign-On (SSO).
Single Sign-On (SSO) lets members sign in to a Teamdeck workspace using their company credentials (such as Google Workspace, Okta, or Azure AD) instead of a separate Teamdeck password. SSO is configured per workspace by an admin and, once enabled, allows members to authenticate via their identity provider.
Who can use SSO
Admins / workspace owners: Configure SSO under
Settings→Integrations.Members and invited users: Use the
Log in using SSOoption on the login page to sign in with company credentials.
Setting up SSO
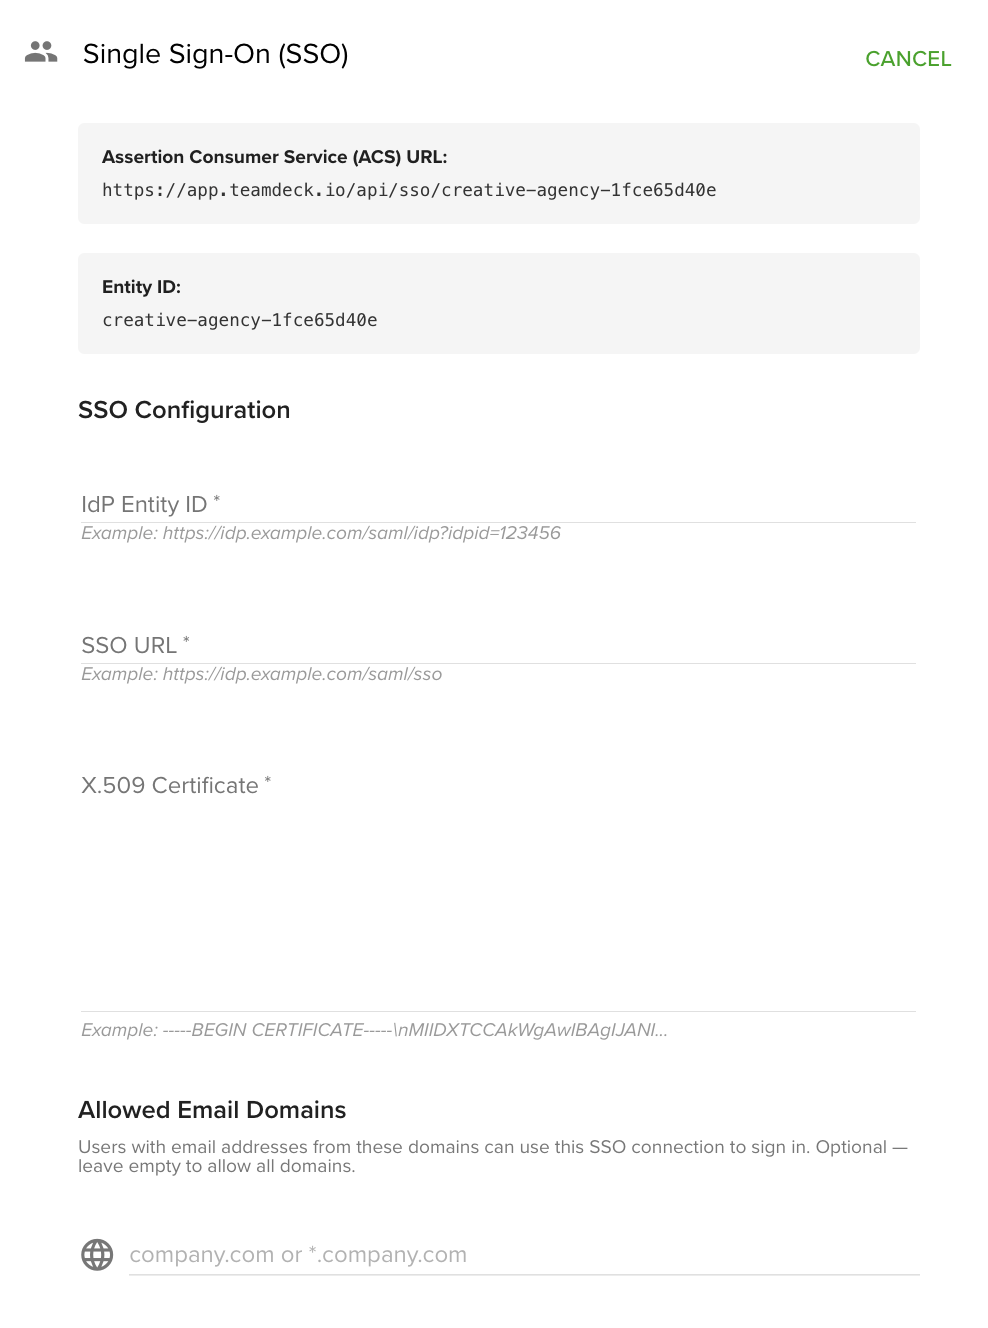
SSO configuration panel in Settings → Integrations
Workspace admins configure SSO by providing details from their identity provider (IdP) or IT team.
Navigate to
Settings→Integrations.Open the
Single Sign-On (SSO)card.Enter the following identity provider details:
Entity ID: Unique identifier for your IdP.
SSO URL: The sign-in endpoint provided by your IdP.
X.509 Certificate: Security certificate from your IdP.
Optionally, configure Allowed Email Domains:
Restrict SSO to specific domains (e.g.,
company.comor*.company.com).Leave empty to allow any domain (subject to workspace membership or invitation).
Choose an SSO User Provisioning option:
Automatically create users on first SSO login: New users are added to the workspace when they sign in via SSO for the first time (Just-In-Time provisioning).
Require invitation to join the organization: Only users with an existing account or invitation can sign in via SSO.
Optionally, enable SSO Enforcement & Exceptions:
Check
Disable owner bypassto require the workspace owner to also use SSO (no fallback to email/password for that workspace).
Copy the Teamdeck service provider details displayed on the screen:
Assertion Consumer Service (ACS) URL
Entity ID
Provide these to your IT team or IdP administrator when configuring Teamdeck as an application in your identity provider.
Click
Save.
Signing in with SSO
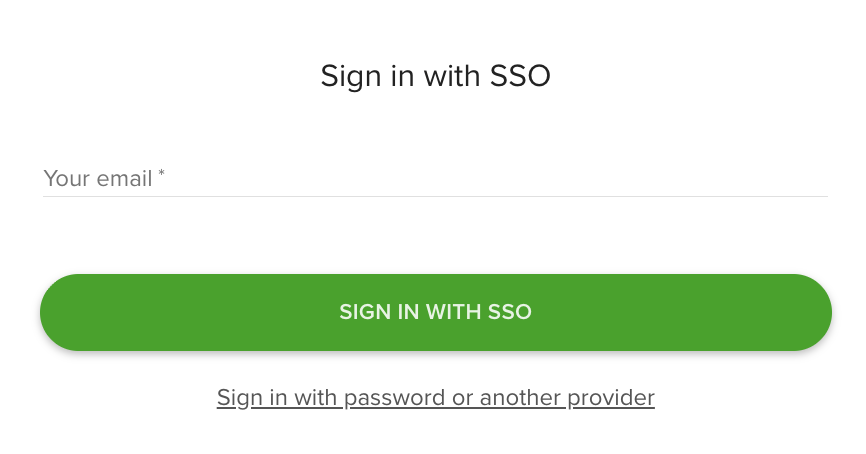
SSO login page with email input and Sign in with SSO button
Once SSO is configured, members can sign in using their company credentials.
On the Teamdeck login page, click
Log in using SSO.Enter your work email address and click
Sign in with SSO.If you have access to multiple workspaces, select the workspace you want to access. If you have access to only one, you will be redirected automatically.
You are redirected to your company's identity provider login page.
Sign in with your company credentials.
After successful authentication, you are signed in to Teamdeck and redirected to the workspace (for example, the Calendar view).
If authentication fails (for example, your email domain is not allowed or you have not been invited), you will be returned to the SSO login page with an error message.

SAML authentication failed error on SSO login screen
SSO and invitations
When SSO is enabled for a workspace, invitation emails sent to new members include a special SSO link. Invited users follow the link and sign in using their company credentials instead of creating a Teamdeck password.
Troubleshooting
SAML authentication failed: Verify that the Entity ID, SSO URL, and X.509 Certificate entered in Teamdeck match the values provided by your identity provider. Ensure your IT team has configured the ACS URL and Entity ID correctly on the IdP side.
User not allowed to sign in: Check the
Allowed Email Domainssetting. If domains are restricted, ensure the user's email matches one of the allowed domains. Also confirm the user has been invited if the provisioning mode is set toRequire invitation to join the organization.Owner cannot sign in with SSO: If
Disable owner bypassis enabled, the workspace owner must use SSO. If the owner needs to regain access via email/password, contact Teamdeck support or have another admin disable this setting.